Step 1:
Click on the link to download the .pdf template for the pop-up Castle:
Step 2:
Print out both pages from the template onto heavy paper, such as card stock or construction paper.

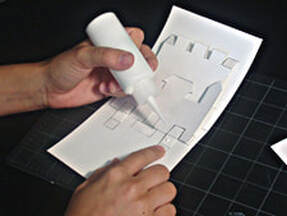
Step 3:Using a ruler as a guide, take the rounded end of a paper clip (or ballpoint pen that has run out of ink) and press along the dotted lines of pop-up pieces and card.
|
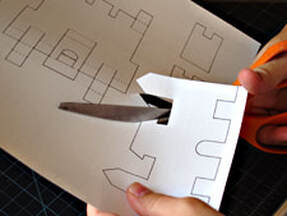
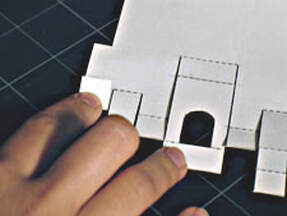
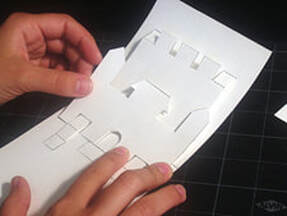
Step 4:Carefully cut out the pop-up pieces and Castle following the solid, black lines.
|
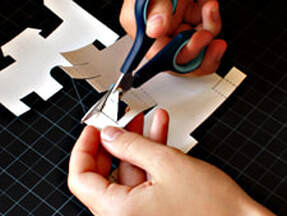
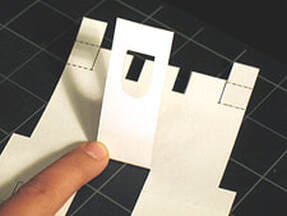
Step 5:Using the tip of you scissor, poke through the drawbridge area and cut it out from the main Castle pop-up piece.
|
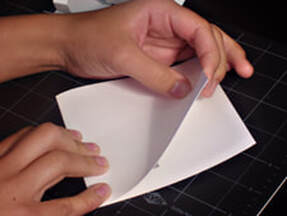
Step 6:Take your Castle card, fold it in half and then open it. Set it aside.
|

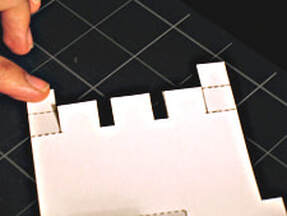
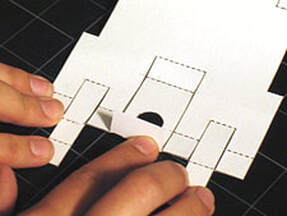
Step 7:Take the main Castle pop-up piece and fold the top left tab back away from you. Crease with your thumb or finger.
|
Step 8:Now place it back to its original position.
|

Step 9:Repeat the step with the same tab this time on the second dotted line, folding it back away from you.
|
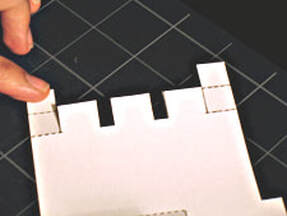
Step 10:Release it back to its original position. Apply the same steps with top right tab on the other side.
|
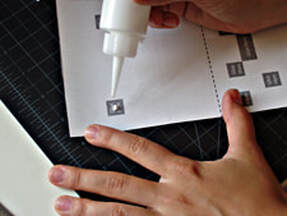
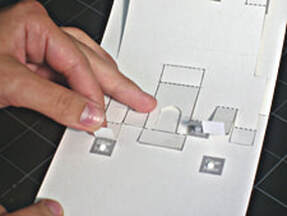
Step 11:Now take your card and apply a small amount of glue to the top two grey squares marked "Glue Here" on the left and right side only.
|
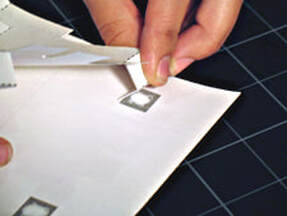
Step 12:Start with the left top tab, fold the top tab back and place it on top of the corresponding left grey square.
|
Step 13:Press firmly and let the glue dry. Repeat the steps for the other side.
|
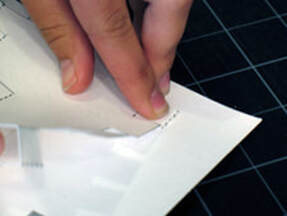
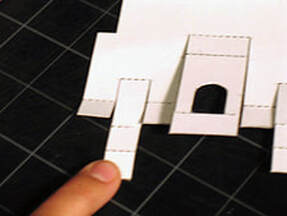
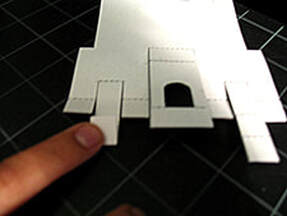
Step 14:Take your main Castle pop-up piece and start with the first tab at the bottom and fold it up. Crease with your finger.
|

Step 15:Put the tab back to its original position.
|
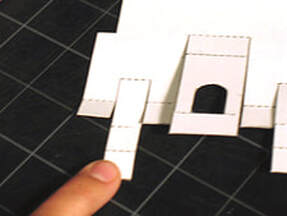
Step 16:Take the next tab and fold it up starting from the top. Crease with your finger.
|
Step 17:Place it back to its original position.
|
Step 18:On the same tab now fold the second dotted line up, creasing with your finger.
|

Step 19:Place it back to its original position.
|
Step 20:With this same tab repeat the step for the preceding tab and fold it up, creasing with your finger.
|
Step 21:Place it back to its original position.
|
Step 22:Now take the next tab and fold it up, crease with your finger.
|
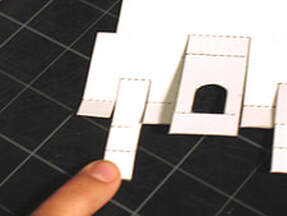
Step 23:Place it back to its original position.
|
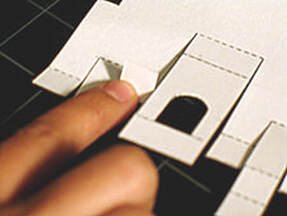
Step 24:Take the tab with the drawbridge; follow the same steps folding up at the base of the tab upwards. Crease with your finger.
|

Step 25:Now fold the preceding dotted line up and crease with your finger.
|

Step 26:Place it back to its original position.
|
Step 27a:Now fold the last preceding dotted line up and crease with your finger.
|

Step 27b:Place it back to its original position. Now repeat the same steps on the last three tabs on the other side.
|
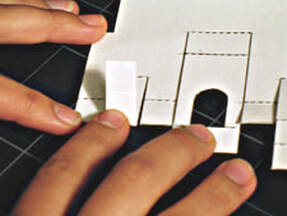
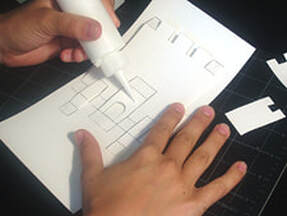
Step 28:Place a small amount of glue on the grey area marked "glue here". And align the bottom tabs of your main pop-up piece with the matching grey areas. Press firmly and be sure let the glue dry.
|

Step 29:Place fingers under the castle piece and raise the piece forward.
|
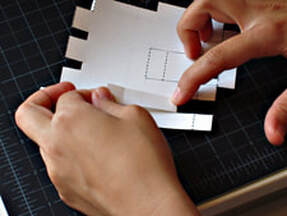
Step 30a:Then fold the Castle card in half and press firmly. Open the card and lay it flat.
|
Step 30b:Take the middle-sized piece and glue it to the center of the main Castle. Press firmly and let dry.
|
Step 31a:Take your remaining Castle pieces. Apply a small amount of glue to the side tabs of the main Castle piece.
|
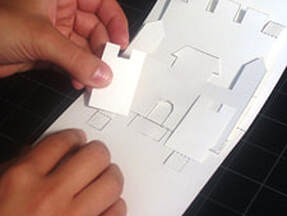
Step 31b:Place the small Castle tower pieces on top, press firmly and let glue dry.
|
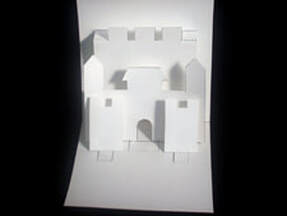
Step 32:Place fingers under the Castle piece and raise the piece forward. Then fold the card in half and press firmly. Open the card. Your Castle pop-up is now finished! Long live the King and Queen!
|